

Installation guide
Getting started checklist
- Register on website
- Confirm e-mail
- Connect your Twitch and/or DonationAlerts account to Spectre account in settings
- Make sure that your OBS Studio is version 25.0.0 or higher
- Install obs-websocket plugin
- Download Spectre app from your control panel and install it
- Create a command or channel points redemption action in your control panel
Installation information is below
System requirements and installation
Spectre desktop app works on Microsoft Windows and Apple macOS:
- Windows 8 or newer
- macOS 10.14 Mojave or newer
- OBS Studio 25.0.0 or newer - download
- obs-websocket plugin fo OBS Studio - version 4.8.0 or newer - download. Plugin installation guide is available at the plugin download page.
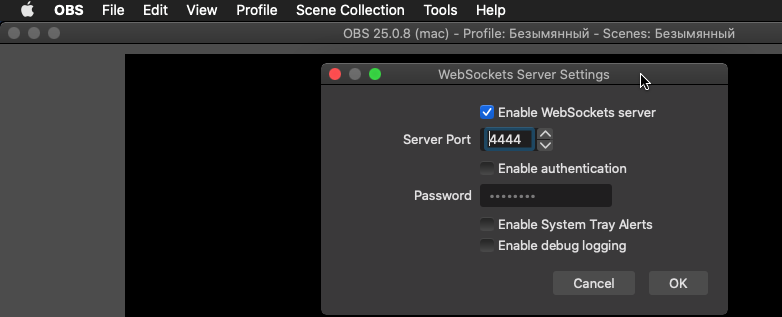
Successful installation adds "WebSockets Server Serttings" submenu to the "Tools" menu of OBS Studio.
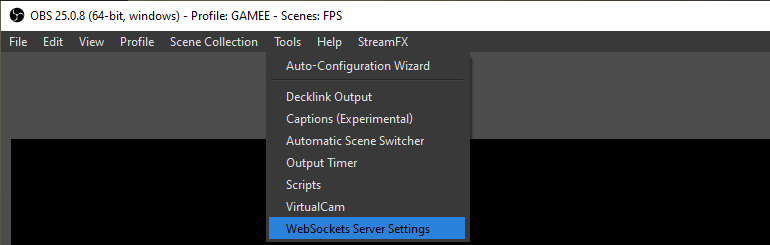
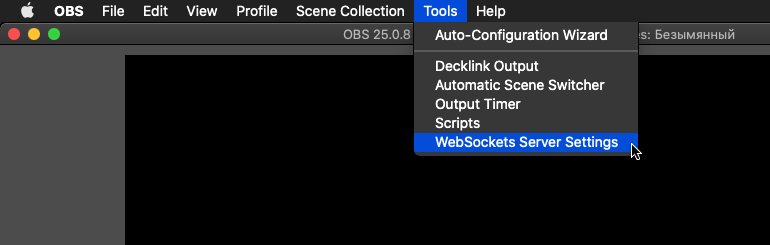
Set your Websockets settings as shown on the following screenshots.

Spectre app installation
After you register at Spectre, you will get access to your control panel on site, which has a Downloads sections - just download an appropriate installation file for your operating system and run it. All the commands settings are done in your controll panel.